Monday, June 27, 2011 0 comments

Sweet Benefits!


Apricots were the star of the show this week as our team produced more fantastic blendz in the lab.Our newest blend has the sweet flavors of apricot, peaches, and apples that's sure to please a crowd. We love apricots as it is satisfying to the palette, and a healthy treat.

 Here is a list of the health benefits:

-Rich in fiber/aids in food digestion when your little one is constipated.

-Iron & copper is present in apricots which helps treat people who suffer from anemia. When digested, the fruit helps in the formation of hemoglobin.


Other benefits include:
-Reduces oily skin when applied to the body & relieves eczema...no wonder why apricot is found in facial scrubs.
-The oil of an apricot has been known to relieve asthma.
-The natural oils that are present in an apricot has been known to relieve an earache.

The next time that you enjoy a tasty apricot think of all the health benefits that are packed in the amazing fruit. See you at the market!


Wednesday, June 22, 2011 0 comments

Nutrient Combination for Optimal Absorption

Like peanut butter and jelly, some things in life just work better together. While our bodies take in nutrients from foods even when eaten alone, some nutrients are better absorbed when eaten together.

Iron and Vitamin C: Adding vitamin C source to a meal increases absorption of non-heme iron (plant based iron foods) up to six-fold which makes the absorption of non-heme iron as good as heme iron (meat based iron foods) absorption.
  • Spinach and strawberries
  • lentils and bell peppers
  • Millet and butternut squash or brussel sprouts
Vitamin D and Calcium: Having a sufficient amount of vitamin D is necessary for calcium absorption. If you live in a sunny place just 10-20 minutes in the sun each day will allow your body to make sufficient vitamin D. If you live in a area that is cloudy most of the time supplementation is more than likely necessary. Other than canned salmon, milk and fortified cereals there are few food sources of vitamin D.

Vitamin A, E, D, K and Fat: All of these vitamins are fat soluble therefore should be eaten with fat rich foods to aid in absorption. Just a small amount is sufficient, such as drizzled olive oil. Avocado and nuts contain both fat and a fat-soluble vitamin.

Sunday, June 12, 2011 0 comments

Cover those bum bums


So I went to a friend's baby shower yesterday and played fabulous games. One of the games that stuck in my mind was a quiz on how well we knew certain customs and information pertaining to babies and the effects of having one. One question that stuck in my mind was how long does a diaper last on Earth before it disintegrates.

 I knew that a diaper lasts awhile after a consumer uses it, but the answer shocked me! For those that do not know the answer, get ready to be amazed. It takes anywhere from 200-500 years as it depends on the company's materials that they use. Yikes!! Talk about a landfill full of diapers, not to mention where they dump the product after the process. Lucky for us there are alternatives to covering our babies bum bums that are Eco-friendly. Cheers to a better planet for our children! Check out what I found:


http://www.gdiapers.com/happy-planet 
You can flush or compost the liner for very speedy results, or you can even toss it -- these decompose in just 2-6 months! 


http://www.bumgenius.com/products.php


http://www.naty.com/us/Home/tabid/90/Default.aspx

http://www.seventhgeneration.com/

Saturday, May 28, 2011 0 comments

Hold your Melons!


Summer is coming and we all know that summer brings delicious produce for us to enjoy. One of my personal favorite fruits include watermelon as it is a great snack to enjoy on a hot and sunny day.Watermelons are part of the Cucurbitaceae family which include relatives such as pumpkins, squash and cantaloupe. Now we all know that watermelon is great to the palette, but the health benefits outweigh the taste. Watermelon is packed with antioxidants, and good sources of vitamins A and C. Watermelon has been found in studies that help to reduce the inflammation that contributes to diabetes, colon cancer, asthma and arthritis. This morning I decided to implement this healthy fruit into my diet. I sliced up pieces of a watermelon and juiced it. My kids love the fresh juice that was waiting for them when they woke up! Try these yummy recipes for your little one.

Watermelon pops
1. Slice thick portions of watermelon into rectangle pieces.
Add a Popsicle stick and freeze
Enjoy after the watermelon becomes frozen
 (This recipe is great for teething babies)

2. Watermelon Smoothie
Add fresh watermelon, Greek yogurt and grapes
Blend and serve


Tuesday, May 17, 2011 0 comments

Oh How Fun Parents Can Be!

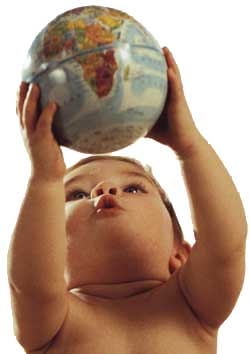
Your baby needs you to help them learn about the world around them. As your baby grows, try these fun activities which are sure to bring forth laughter and stimulate their developmental growth.

3 to 6 months:

Babble Babble!
Know that your little one is making sounds, go ahead and communicate with him or her. As your baby says "goo" you can say "Wow, what else did you do?" This form of communication encourages positive reinforcment. As your baby starts to understand that you are listening, they will become encouraged to talk away!

Get that Toy!
Tie a piece of yarn around a small stuffed animal, plastic link or teething ring.Hold the item in front of her (within arm length) and sway it from side to side. As your baby begins to reach for the toy they will practice their Eye-Hand Coordination, Fine Motor Skills, and Visual Development.
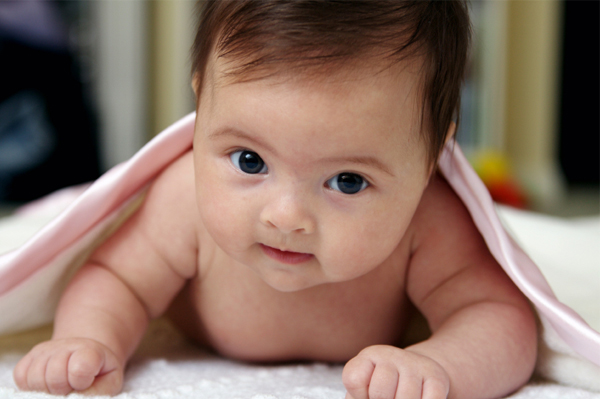
Tummy Time:
Roll up a towel, or blanket into a long roll and tie it on each side with yarn. Make sure that the roll is tight to avoid unraveling. Lay your baby on his stomach as you gently place the roll under his chest area so that he is lifted by the roll. This will help your baby to raise up and put weight of his forearms. This fun activity will help your baby get ready for crawling as he will creep forward, roll and reach for toys that are placed in front of him. This activity enhances social development, emotional development and upper body strength.

6 months & up:

Hide the Surprise!
Loosley wrap bright colored toys in constrution baby, and let your little one find the "surprise" that's inside. This will allow your baby to rediscover toys, develop problem solving skills, and fine motor skills.

1 Container 2 Container
Gather plastic containers of all sizes and allow your baby to fill them up with toys. Some ideas to fill each container with would include blocks, measuring cups, rattles, and plush toys. make sure to put them each in there own container as it seems more appealing. This activity exercises fine and gross motor skills.

Pop!
Get out your bubbles and begin to blow! Once the bubbles are in the air, try catching one on the wand and allow your baby to touch it. Say "POP" when the bubble dissolves. This activity promotes hand and eye coordination and establishes cause and effect.Wash your baby's hands after your activity, and make sure that they do not rub their eyes with the solution on their hands.

9 months & up:

Open & Shut
Finally those empty wipe containers can be used for something! Place 3 empty wipe container in a row and allow your baby to put toys inside. Every time your baby opens up the container say open, and close when the container closes. Your baby will learn problem solving, size and shape discrimination, practice using fine motor skills, and spatial awareness.

Ball Drop
Place a mixing bowl, preferrably a metal bowl, out with a variety of balls. You may want to you rubber balls of all shapes, and a tennis ball. Show your baby how to drop the balls into the bowl and listen to the different sounds that they make. This activity allows your baby to practice her hand-eye coordination, fine motor skills and grasp and release.

Sing a Little Song
Her are the lyrics, now sing along!

-Nose, nose, jolly red nose
(touch your nose)

and who gave thee that jolly red nose?
(Point to your baby's nose)


Nutmeg and ginger, cinnamon and cloves
(wrinkle up your nose and pretend to sniff your palm of your hands)

that's what gave me this jolly red nose.
(gently tap your baby's nose)
Tuesday, May 10, 2011 0 comments

We want to keep you informed!


Bare Blendz, LLC


Have an e-mail address? E-mail us at info@bareblendz.com to receive Bare Blendz information....including coupons! :-) You can also visit us at http://www.bareblendz.com/index.html and leave a comment under our contact us page.
Wednesday, May 4, 2011 0 comments

Our top 5 kid & parent friendly companies!

Recently we asked our friends on Facebook to tell us about their favorite kid friendly business . Today, we thought that it would be great to give you the top 5 businesses that make our list for having kid and parent friendly environments. Here they are!
                                                        
1. No Sugar Added
Location: 141 North Yale Avenue
Claremont, CA 91711-4723

Hours:Mon-Sat 10am-6pm; Sun 10am-3pm

Why we picked them: They sell a variety of eco-friendly products from laundry soap for sensitive skin to cloth diapers. They carry cute clothing for your little one and a variety of educational toys. No Sugar Added has a backroom that is dedicated for nursing, and a place for your kiddos to watch a movie. My shopping experience here was so pleasant due to my 3 year old watching a movie while I shopped. The best part was that I could see him the entire time through the doorway that is decorated with cute curtains that are pulled to the side with a bow. The staff was so friendly and helpful as they are parents themselves. Cheers to No Sugar Added!


2. Victoria Gardens Mall
Location: 12505 North Main Street
#200, Rancho Cucamonga, CA 91739

Hours:Mon-Thu 10am-9pm; Fri-Sat 10am-10pm; Sun 11am-7pm

Why we picked them: We love the fact that this mall has turned shopping into a family event! They offer a playground full of benches for parents to watch their little one, a water fountain for the kids to play in, and a large grass area that is great for tossing around a bouncy ball. There are many family restrooms that have mini toilets for smaller children, and nursing stations. They offer free movies and concerts in the grass area during the summer to enjoy. So grab your blanket for a picnic and plan a day out at this kid friendly mall!


3. Ralphs Super Market
Why we picked them: They have mini shopping carts for the kids to push around the store. They are usually located near the self checkout lanes.This can be a great experience for the parents if you plan on purchasing a small amount of products. This fun way to shop can provide your child with a great learning experience. Try having your child count the products that they put into the basket, or help you find the next product that you need in an eye spy game. 


4.Jake & Ella online boutique
Why we picked them: Ok, so this kid friendly business is an online store that offers many eco-friendly goodies. They have everything from clothing to natural wellness supplies. Jake & Ella is a great store that supports eco- friendly merchants, and provides parents with resources that offer healthy alternatives for their children. The owners bio  describes the way that they raised their children which consisted of growing a garden, becoming conscious of nature, and living a healthy lifestyle. Jack & Ella is more than an online store, but a great resource for parents who want to live healthier. Thank you Jake & Ella!


Website:http://www.jakeandella.com/pages/why-shop-with-jake-ella


5.The Americana at Brand in Glendale, Ca
Why we picked them:This is by far the most baby/kid friendly mall we have been to!! There are two private nursing stations plus two private rooms with changing tables and complimentary wipes and diapers. The rooms are in the back of the concierge area, by the women's bathrooms. They even have a open grass and a playground area for the older kids. We give this venue 5 stars!!! 


Website:www.americanaatbrand.com
Monday, April 25, 2011 0 comments

Attention Working Moms & Dads

Attention Working Moms & Dads 

Do you currently work or thinking about going back to work? For some, the thought of taking your child to a daycare can be a bit scary. Rest assure that there is a way to find the daycare, or babysitter that meets your expectations. Here are some helpful tips.

1. Licensing- A childcare facility or in home daycare must be licensed in order to provide service for your child. Licensing makes sure that the facility, or home is up to standard in regards to sanitation, and safety. For more information you can call your local health department. If you are in the Inland Empire you can call Community Care Licensing at  (951) 782-4200 for information. They are located at:
3737 Main Street, Suite 700, Riverside, CA

2. Ratios-For every 3-4 infants there must be 1 teacher. The more infants there are to a teacher means that your little one may have to wait for someone to attend to his or her needs.

3.Healthy & Safe Staff- This simply means that all staff must be CPR and First aid certified. They must be up to date on their TB test as well as have a current background check. As a parent you are entitled to ask these questions about the staff.

4.Loving Atmosphere- A daycare that allows a parent to come in at any time is always a good sign.

5.Stimulating Atmosphere- Make sure that your daycare offers many stimulating activities such as toys, out door activities, music, books and occasional field trips. These activities allow your child a sense of change which fosters their developmental growth and interaction.

6. Separation of Age Groups- Infants should not be mixed with children over 1 years old due to safety, and developmental issues. Toys must be age appropriate as well as the curriculum.

Daycare childcare centers allow children to socialize and learn.


7. Strict Sanitation Rules- Staff must wash their hands often to avoid spreading germs. Know your daycare's sick policy. Children should not be allowed to come to school if he or she is running a fever. The child is able to return to school 24 hours after having a fever. Toys must be sanitized often and food and diapering stations must be separated.
Wednesday, April 6, 2011 0 comments

Money Saving Tricks!


Since gas prices are soaring high, we thought that we could give you a few tricks to keep the grocery budget a bit lower. Any way to save can help! :-) Here are some helpful tips that can help any mom, or dad spend less at the grocery store and still make satisfying and healthy meals. Enjoy!

  • Go shopping alone ( if you take your kids your going to spend a lot more)
  • Have a budget and stick to it
  • Make fewer, larger trips (Create a day to do all your grocery shopping for the week or every two weeks if you can)
  • Don’t shop hungry (the hungrier you are, the more you put into your shopping cart)
  • Plan your meals in advance 
  • Scan your cupboards, pantry, and fridge before leaving ( This allows you to use what you already have to create fantastic meals)
  • Keep a running list of items you need on your fridge

  • Clip (and use!) coupons for name brand items
  • Check the store’s website for printable coupons
  • Avoid non-grocery items that can be bought for less elsewhere
  • Cook from scratch, avoid processed foods (Cost more)
  • Avoid frozen/prepared entrees
  • Eat more fruits/veggies, cut back on meat
Monday, April 4, 2011 0 comments

Walking for a great cause!


Will you support kids in need? We still need donations and/or walkers for Sunday April 10th at Victoria Gardens Mall in Rancho Cucamonga to help raise money for The Ronald McDonald House Charities. They do so much for our community, check out what they do. http://www.rmhcsc.org/community_impact.php 
Also you can make a direct donation on our link http://www.walkforkids.org/bar
www.rmhcsc.org
Welcome to the Ronald McDonald House Charities of Southern California, RMHCSC, where we're making a positive difference for children and families in need


Tuesday, March 22, 2011 1 comments

Baby it's Cold Outside!

Baby it’s Cold Outside!


 So rain is in the forecast, and it's not going to mess up my day. With three boys in our household rainy days are always a challenge as they like to stay active.  Bare Blendz understands that keeping our kids entertained can be challenging, but it creates memories. Here are some fun activities and snacks that your kids can help you make. They are sure to bring laughter for you and your children on those rainy days to come.

A Warm Breakfast to Start your Day:
*Pink Oatmeal
What you’ll need:
2 cups of raspberries
2 cups of strawberries
Coconut flakes (optional)
Oatmeal
Directions:
Mix the raspberries, and strawberries in the blender with 1 cup of water.
Mix into the cooked oatmeal, and top with coconut flakes.

Breakfast for Baby:
Bare Blendz Apple Pie A La Mode made with oatmeal, apples, and black strap molasses

Arts & Crafts:
Each craft that is created allows your family to bond, and enhance your child’s fine motor skills as they use hand and eye coordination. Your toddler can enjoy these activities too as they are introduced to using these motor skills. (Parents please cut the pieces out for children that are younger.) Try using bright colors to stimulate your child’s thinking process.

Cheers to Magazines:
*We all have magazines in the house that we have read over and over. Instead of throwing them away why not make a funny picture with the cut out pieces. Find pictures of animals and make a farm collage, or tell your child to pick out pictures that describe their house hold and place them on construction paper.

Sock Puppet:
Get an old sock and hot glue buttons for the eyes, or allow your child to draw the eyes on. Yarn displays the puppets mouth and a cheerio for the nose. Create your own puppet show for the family to enjoy!


A fun “Make it yourself” Snack for kids:
These nutritious snacks allow the kids to help you prepare them. Another fun idea to keep the kids entertained! Did we mention that they are all made with raw foods. (yay!)
*Banana Bites
What you’ll need:
2 bananas, peeled with the ends cut off (This part is for the parents to complete)
12 raisins, dry
12 walnuts, dry
Directions
Slice the banana into 6 equal pieces (12 pieces total)
Push a raisin into one banana circle, and then top with a walnut…repeat the process.


Monday, March 21, 2011 0 comments

BARE BLENDZ WALKS FOR KIDS!


JOIN BARE BLENDZ AND WALK FOR KIDS!

WE WILL BE WALKING ON APRIL 10, 2011 AT THE VICTORIA GARDENS IN RANCHO CUCAMONGA!

SIGN UP AT THE FOLLOWING SITE AND JOIN OUR TEAM TO COLLECT MONEY FOR THE KIDS:

http://www.walkforkids.org/bareblendz

HOPE TO SEE YOU THERE FOR THIS GREAT CAUSE!
Wednesday, March 16, 2011 0 comments

Teething Biscuit Recipes


Bare Blendz' loves this article on Teething Biscuit Recipes. Check it out:


http://babies2toddlers.com/baby-teething/teething-biscuit-recipes

Teething biscuits and finger foods are not just about nutritional intake and helping teething discomfort. Giving your baby teething biscuits will help your baby develop motor skills and also start to find out what it is like to eat solid foods.

Making teething biscuits at home rather than buying branded foods
is one alternative, and would require learning about various recipes for teething biscuits. There are many teething biscuit recipes and making them yourself at home is a good alternative to buying branded ones.


Banana Bread Sticks

1/4 cup brown sugar
1/2 cup oil
2 eggs
1 cup mashed banana
1 3/4 cups flour (white, whole wheat, or a combination)
2 teaspoons baking powder
1/2 teaspoon baking soda

Combine ingredients and stir only until smooth. Pour into a greased loaf pan.
Bake at 350 degrees F for about 1 hour or until firmly set.

Cool, remove from pan, and cut into sticks. Spread sticks out on a cookie sheet and bake at 150 degrees F for 1 hour or longer until the sticks are hard and crunchy. Store in a tightly covered container. Source: Feed Me I’m Yours by Vicki Lansky

Egg-Free Baby Cereal Cookies

1 cup flour
1 cup dry flavored or unflavored infant rice cereal
3 tablespoons cooking oil
ice water

Directions:
Preheat oven 425F
Mix flour and cereal.
Gradually stir in oil. Mix a little ice water at a time (start with 1/4 cup) until dough begins to form a ball and pull away from the bowl.
Roll out to the thickness of a cracker on a floured surface and cut into desired shapes.
Bake on an ungreased cookie sheet 10-12 min. or until lightly brown. Cool completely.

The obvious advantage to using your own recipes for teething biscuits and making them yourself is that they will probably be more nutritious for your baby plus it can help save you a lot of money. Also, there are many store-bought teething biscuits
that contain high sugar levels or other ingredients that can even lead to your baby developing allergies.
Friday, March 11, 2011 0 comments

Emergency Preparedness


As you may know, last night, Japan was hit with a major emergency. A Tsunami struck the coastal communities after a 8.9 magnitude earthquake hit. I woke up at 11:00PM hearing a CNN News update on my phone and spent the next hour watching TV in horror. Cars turned on their heads, missing passenger trains, over turned ships! All i could do was pray. On my way back to bed, I took a look at my children as they slept and wonderd, If a major emergency hit our community, would we be prepared??

While events unfold in Japan and while other local coastlines are under tsunami warnings, Bare Blendz would like to take a moment to highlight some important tips on being prepared for an emergency, no matter the magnitude.


If your children are old enough to understand what happened in Japan, talk to them about what an emergency is. Tell them:

-Where to meet away from your home in case of a fire (like a neighbor’s house or the corner of the street);
-Where to meet outside your neighborhood if you must evacuate. You should pick a friend or relative’s house;
-Where to call to "check in" if you become separated from your family during a disaster. You should memorize the phone number of a favorite aunt or family member who lives in another state. You would call there to report where you are so your family can find you.
-Write down your family plan keep it in your backpack.


Prepare a disaster supplies kit for your home. Include:

• a first aid kit

• your favorite snacks

bottled water

• battery-operated radio

• flashlight or glow sticks (never use candles)

• an extra set of clothing

• include a family photo

• Phone numbers & addresses of relatives

• Color book & crayons


If your child goes to school, be sure that they have an emergency card.

Your child's emergency contact information should include:

• Child's full name, date of birth, special health care needs such as allergies.

• Names and phone numbers of primary caregivers and back up contacts, including one out-of-state contact in case of city-wide or state-wide disaster.

• Names and phone numbers of medical and dental providers.

• Names and phone numbers of preferred hospitals.

• Copies of current insurance or Medicaid cards (black out part of the Social Security Number if you are concerned about identity theft).

• Medications.

• Parent/guardian signatures authorizing emergency care.
Wednesday, March 9, 2011 1 comments

Teaching while Creating a Bond


ways to have fun and bond with your baby:


1. Gently rock your baby as you sing. It can increase alertness as you make eye to eye contact.
2. Dangle a bright ribbon or scarf over your baby and say the colors that are on it.
3.Point to your baby's toes, knees, hands, etc. as you make it into a song by saying the name of the body part.


Have fun!
Tuesday, March 8, 2011 2 comments

Goodbye Bottle!

Goodbye Bottle!

So you decided to say goodbye to your baby’s bottles. Although the journey may be hard, your baby is growing up which requires new transitions. Here are a few tips to make the process a little better for you and your baby.

1.   Choose fun Sippy cups with characters that your baby will love. Allow your child to pick his or her own “special” cup.

2.    While weaning your baby off of the bottle, try switching the bottle for a Sippy cup and put their favorite drink in the cup.
3.   Get rid of all of the bottles. Yes all of them. :-) By seeing the bottles in the house it will create confusion and possible tantrums as your baby will demand them back.
4.   As you get rid of the bottles make sure that your child sees you do it. Pack them in a bag and tell your child that you are sending them to another baby who needs them.
5.   .Stay motivated mom and dad! Once you have made the decision, stick with it. It’s going to be hard, but well worth it.


Congrats! Your child is moving forward by achieving new milestones. 
Wednesday, March 2, 2011 0 comments

Just Say No!

Just say No!


Many of the juices that are on the shelves for children contain high levels of sugar. Due to the increase in sugars a baby may experience baby bottle tooth decay. Baby bottle tooth decay is when a baby drinks juice from a bottle which allows the sugars to sit slowly as it is sucked from the bottle. The sugar turns into a bacteria as it sits in the child’s mouth, and transforms into an acid. Once it is in the form of an acid, it breaks down the enamel of the teeth which causes them decay. Now this can create tooth problems at a young age but the good news is that it’s 100% preventable!


If you choose to allow your child to drink juice, choose 100% juices that contain a minimum amount of sugar. Juicing fresh fruits and vegetables is the best source for children and adults to get the nutrients that they need without the extra sugar. Avoid letting your baby drink juice out of a bottle. By putting juice in a sippy cup the sugar can flow past the child’s teeth which avoids tooth decay. Last, do not let your child drink juice before bed. This process allows the sugars to sit on the teeth while they are sleeping.

Monday, February 28, 2011 0 comments

Whoa Baby!!


Whoa Baby!
Hey parents out there! Ever wonder what exciting thing your baby will do next? Well here is a timeline of Childhood Milestones to enjoy. *Please note that in some cases these milestones may be accomplished earlier or a little later in each child.
Timeline of Childhood Milestones
2 Months
Smiles at the sound of your voice
3 Months
Raises head and chest when lying on stomach
Grasps objects
Smiles at other people
4 Months
Babbles, laughs, and tries to imitate sounds

6 Months
Rolls from back to stomach and stomach to back
Moves objects from hand to hand
7 Months
Responds to own name
Finds partially hidden objects
9 Months
Sits without support
Crawls
12 Months
Walks with or without support
Says at least one word

Enjoys imitating people
18 Months
Walks independently
Drinks from a cup
Says at least 15 words
2 Years
Runs
Speaks in two-word sentences
Follows simple instructions
Begins make-believe play
3 Years
Climbs well
Speaks in multiword sentences
Sorts objects by shape and color
4 Years
Gets along with people outside the family
Draws circles and squares
Rides a tricycle
5 Years
Tells name and address
Jumps, hops, and skips
Gets dressed
Counts 10 or more objects

Friday, February 25, 2011 0 comments

Drum roll please..............


Our website is now up at Bare Blendz.Come check out our delicious blendz. We will see you at a Farmer's Market and in stores very soon!
http://bareblendz.com/index.html
Wednesday, February 23, 2011 0 comments

Dinner is Served!


So it's a busy week night and the kids have homework to do, laundry needs to be done, baths need to be taken and of course dinner needs to be made and served. Lucky for you here at Bare Blendz we understand what it's like to have a busy household. Now that you have your little one covered for dinner with his or her delicious Bare Blendz, here are some recipes for the rest of the family to enjoy.These simple and quick recipes are sure to please your family so that you can spend more quality time with one another.


1. Salmon Patties
Serves 4
Ingredients
    16 ounces canned salmon, drained, skinned, and boned 1 cup cracker meal (about 1/2 sleeve Saltines, crushed fine) 1/2 cup Hellman's or Best Foods mayonnaise (not low-fat) 1 teaspoon Old Bay seasoning 1 teaspoon hot pepper sauce (optional) The finely grated zest of 1 lemon, plus 2 tablespoons of its juice 1/2 teaspoon kosher salt (or half as much table salt) Freshly ground black pepper 1 stalk celery, finely chopped, plus some of the leaves, also chopped 2 tablespoons fresh dill, finely chopped Vegetable oil for frying or you can bake the patties Tartar sauce, purchased or homemade (see recipe below) Tartar Sauce (Makes a little more than 1 cup): 1 cup Hellman's or Best Foods mayonnaise (not low-fat) 2 tablespoon lemon juice 1 tablespoon finely chopped fill 1 tablespoon prepared horseradish 1 teaspoon capers 1/2 teaspoon kosher salt (or half as much table salt)
Directions
  1. For the tartar sauce: Whisk ingredients together in a small bowl and chill until serving.
  2. Flake the salmon with a fork, then add the cracker meal to the bowl and use your hands to blend it into the fish.
  3. Whisk together the mayonnaise, Old Bay, hot pepper sauce, lemon zest and juice, and salt and pepper, then stir it into the fish mixture along with the celery and dill. The mixture should just hold together: Add more cracker meal if it's too wet, or a bit more mayonnaise if it's too dry. Use a 1/3-cup measure to form 8 patties around 3 inches wide and 1 inch thick.
  4. Heat 1/4 inch of oil in a large nonstick skillet over moderate heat, until a pinch of the fish mixture sizzles when dropped in the pan. Fry the cakes in a single layer until golden, around 4 minutes per side. Drain on a paper-towel-lined plate and serve with tartar sauce.

2. Mini Pizza's
Serves 2-double the recipe to make 4
Ingredients
    1 English muffin, cut in half 1 tablespoon tomato paste 1 teaspoon red pesto 1 tablespoon olive oil 1/2 small red onion, sliced 2 to 3 button mushrooms, sliced 1/2 small zucchini, thinly sliced Salt and freshly ground black pepper 1/2 cup ready-grated mozzarella or grated Cheddar cheese
Directions
  1. Toast the muffin until golden and leave to cool. Preheat the broiler. Mix the tomato paste and red pesto and spread over the muffin halves. Heat the olive oil in a frying pan and cook the onion, mushrooms, and zucchini until softened and golden.
  2. Add the seasoning and then divide the vegetables between the muffin halves and scatter the mozzarella or Cheddar over the top. Place under the broiler and cook for 4 minutes or until golden and bubbling.

3. Five Cheese Pasta
  • 1 pound Rigatoni, or small shells
  • 2 cup heavy cream
  • 1 teaspoon Basil, dried
  • 1 cup Crushed tomatoes in heavy puree
  • 1 package Italian blend cheese (8 ounces divided - mozzarella, mild cheddar, provolone, and asiago)
  • 1/4 cup gorgonzola cheese, crumbled
Directions Preheat oven to 375 degrees F. Spray a 9-by-13-inch casserole dish with cooking spray.
1. Boil pasta two minutes less than the package directs in plenty of well-salted water and set aside. Meanwhile, in a large bowl, mix together the cream, crushed tomatoes, basil, 1 1/2 cups of Italian cheese blend, and gorgonzola cheese.

2. Add cooked pasta to the cream and cheese mixture. Stir to combine. Pour into prepared casserole dish and top with remaining 1/2 cup of Italian cheese blend. Bake for 30 minutes, or until top is browned slightly and pasta is bubbling hot. Serve immediately.


4. Grilled Tomato Melts
Serves 4
Ingredients
    • 3 large tomatoes (about 8 oz. each) or a variety of smaller tomatoes (about 1-1/2 lb. total)
    • 4 ounces Monterey Jack cheese with jalapeno peppers or Monterey Jack cheese, shredded (1-1/2 cups)
    • 1 small green, yellow, purple, or red sweet pepper, finely chopped (about 1/2 cup)
    • 1/4 cup toasted sliced almonds

Directions

Preheat oven to 350 degree F. Cut each tomato into 4 slices, about 1/2 inch thick. If using smaller tomatoes, halve each one. For each of 4 servings, arrange 3 tomato slices, overlapping slightly, in a foil-lined, 15x10x1-inch baking pan. (Or, if using smaller tomatoes, arrange in a single layer in a foil-lined,15x10x1-inch baking pan.) Sprinkle with shredded cheese, finely chopped pepper, and toasted almonds. Bake about 15 minutes or until cheese is bubbly. Carefully lift with large metal spatula to individual plates, allowing excess juices to drain off.
To prepare on a grill, arrange ingredients as above in a shallow disposable foil pan. In a grill with a cover arrange medium-hot coals around the edge of the grill; test for medium heat above the center of the grill. Place the pan with the tomatoes in the center of the grill rack. Grill, covered, for 12 to 15 minutes or until cheese is bubbly. Makes 4 appetizer servings.
Make-Ahead Tip: Arrange tomato slices in baking pan and sprinkle with cheese, pepper, and nuts. Cover and chill up to 4 hours. Bake or grill as above.

5. Monterey Tortilla Casserole
Serves 4
Ingredients
    • Nonstick spray coating
    • 6 6-inch corn tortillas, each cut into 6 wedges
    • 1 cup loose-pack frozen whole kernel corn
    • 1 16-ounce jar salsa Verde
    • 3 tablespoons light dairy sour cream
    • 3 tablespoons snipped fresh cilantro
    • 1 tablespoon all-purpose flour
    • 1 cup crumbled Mexican Chihuahua cheese or crumbled farmer cheese (4 ounces)
    • Light dairy sour cream (optional)
    • Snipped fresh cilantro (optional)
    • Chopped tomato (optional)
    • Jalapeno pepper, thinly sliced (optional)

Directions

Spray four 10- to 12-ounce baking dishes with nonstick coating. Place 5 tortilla wedges in the bottom of each dish. Place remaining tortilla pieces on a baking sheet; bake in a 350 degree F oven about 10 minutes or until crisp and golden. Meanwhile, combine  corn, salsa, the 3 tablespoons sour cream, cilantro, and flour. Divide mixture among dishes.
Bake, uncovered, in a 350 degree F oven for 20 minutes. Arrange baked tortilla pieces atop casseroles. Top with cheese; bake for 5 to 10 minutes more or until heated through. If desired, garnish with additional sour cream, jalapeno slices, cilantro, and tomato. 
To bake frozen casseroles: Bake, covered, in a 350 degree F oven for 25 minutes. Uncover; bake about 20 minutes more or until heated through. Top with tortilla pieces and cheese; bake for 5 to 10 minutes more or until heated through. Garnish as above.
To micro-cook frozen casseroles: Cover microwave-safe casseroles with waxed paper; micro-cook on 30% power, allowing 4 minutes for 1 casserole and 5 minutes for 2 casseroles. Continue cooking, covered, on 100% power until heated through, allowing 2 to 4 minutes for 1 casserole or 3 to 6 minutes for 2 casseroles, rotating the dishes once. Top with baked tortilla pieces and cheese; micro-cook, uncovered, about 30 seconds more or until cheese is melted. Garnish as above.
Make-Ahead Tip: Assemble casseroles as directed above, except do not top with baked tortilla pieces; place baked pieces in a moisture- and vapor-proof plastic bag. Freeze casseroles and tortilla pieces up to 1 month.